Post by The Wirefox on Dec 18, 2011 19:42:53 GMT
This tutorial attempts to explain the basics of adding textured layers to your images. Textures are a quick and easy way to add interest to your images. Texturing is not however a quick fix for poor images at capture. You need to have well exposed and sharp images as a foundation for your work.
The brief for this tutorial is to take a edgy subject shot with basic lighting and attempt to give the image a grungy feel more in keeping with the subject matter.
I have used GIMP to demonstrate this process but it can easily be adapted to Photoshop as you will see. GIMP is an open source (free) image manipulation application and is well worth a look if you shudder at the cost of Photoshop.
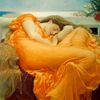
Firstly I open my base image in my image editing software. This image has already been subjected to basic PP.
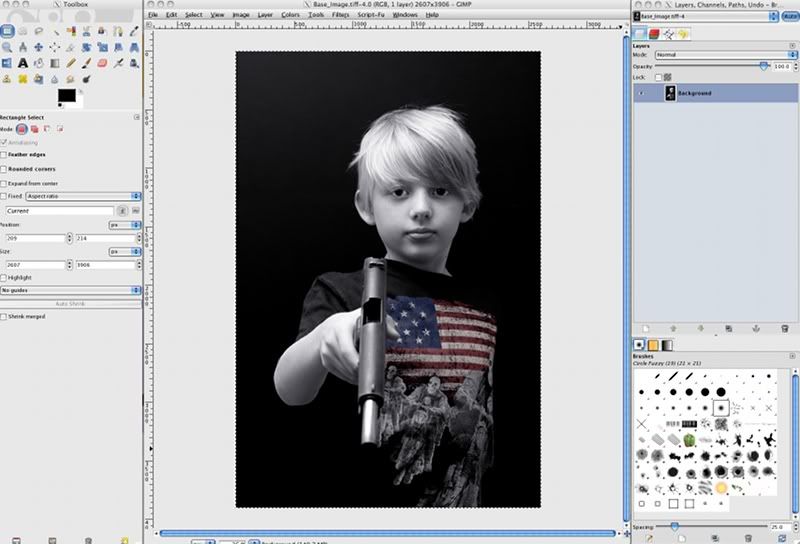
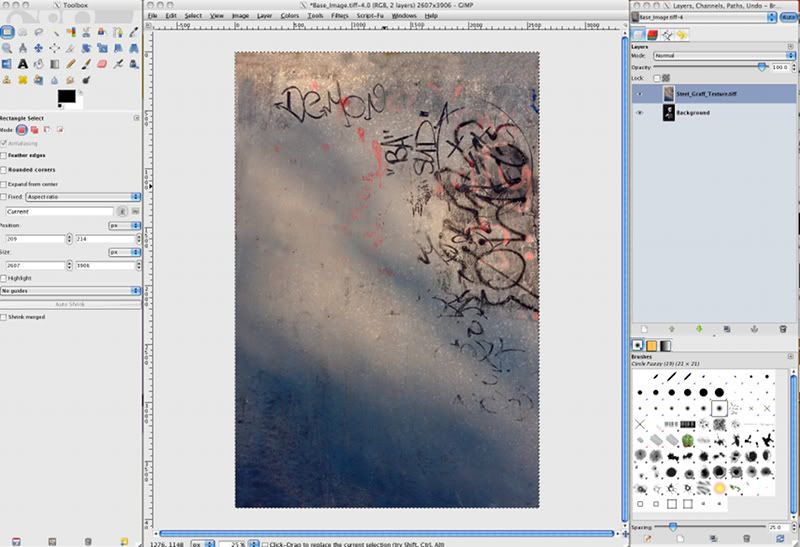
I am now going to open a separate texture image as a layer - effectively placing the texture on top of the base image. In GIMP this is achieved with the commands File / Open as Layers
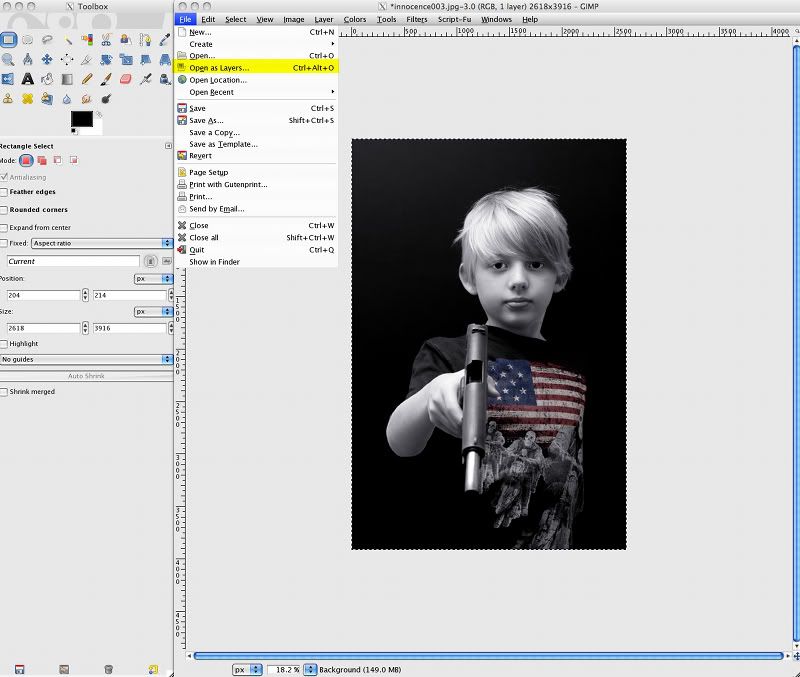
For this exercise I have chosen an image of graffiti on stainless steel sheet at the local skate park. You can get texture packs at sites like Deviant Art and the can be used free on a creative commons license but I find it more satisfying to use my own.
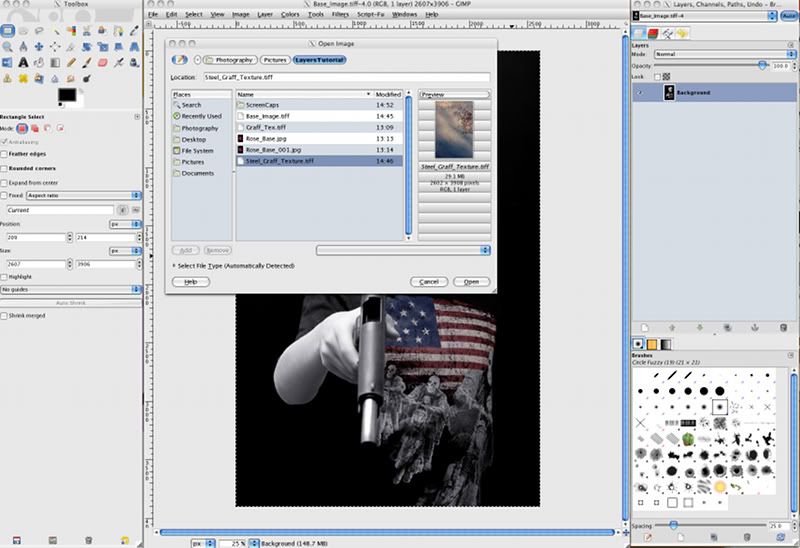
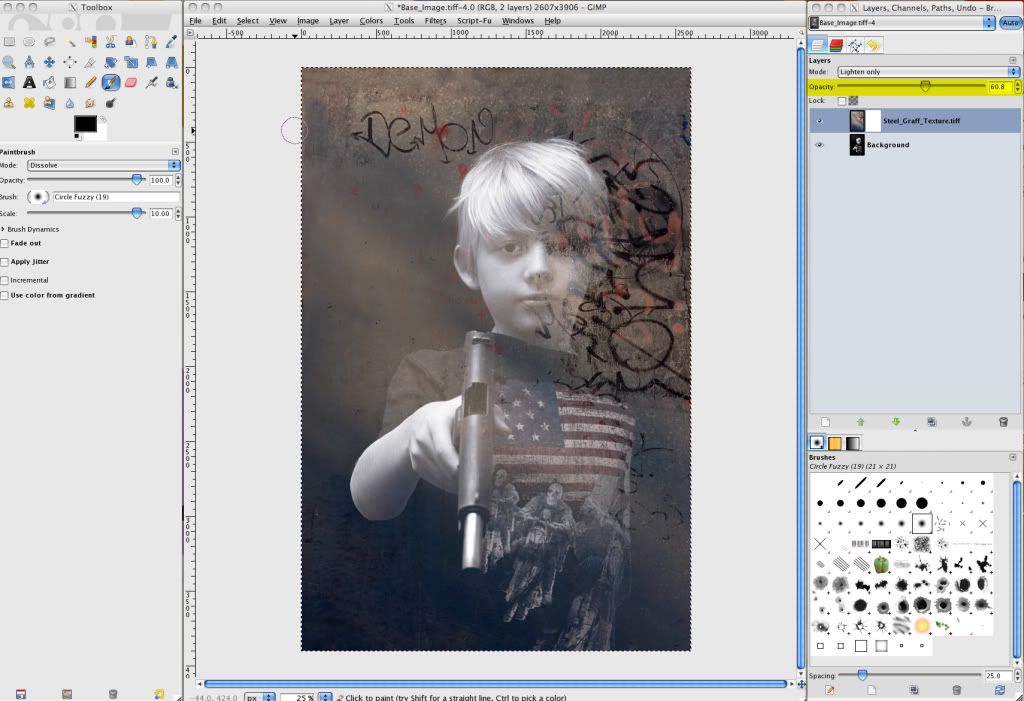
You can see the overlaid image appear in the Layers toolbox above the background image
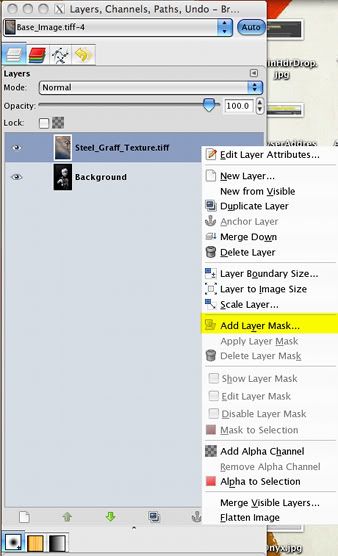
Now I am going to create a layer mask. In this case the layer mask allows me to remove areas of the texture layer (the top layer) exposing portions of the background image below. I think of this as being like two transparencies placed together and scrapping the emulsion off the top transparency to reveal the transparency below;
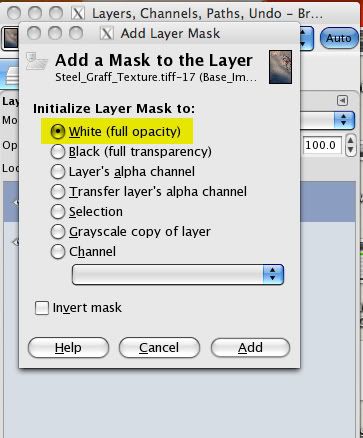
For this technique the layer mask has to be white at full opacity;
Now this is where the fun starts. The top layer (our texture) can have its mode changed to several different styles. These styles along with the opacity slider determine how the layers will interact to give the finished effect. It is worth a having good play around with different layer modes and the opacity of the top layer...you can get some stunning effects. There is no right or wrong way with this since the way the layers interact will depend on your selected images. Your image will always be unique and the combinations are almost infinite.
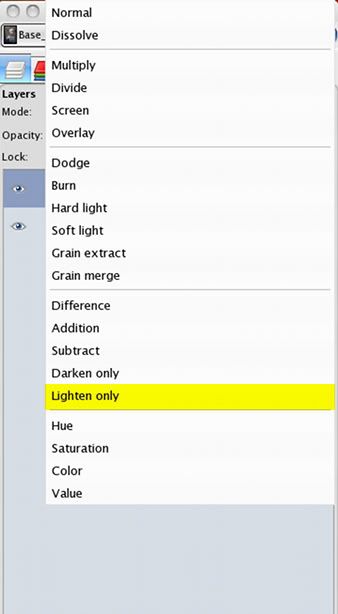
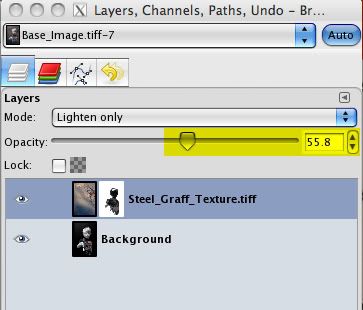
I am using the 'Lighten Only' mode. This gives me an even combination of the tones within the two images. At first it will look a little odd but what you can now see is the images combining like two transparencies with one laid atop the other. I adjust the opacity of the top layer so that I can easily see the outlines of each image. I have used about 60% opacity to achieve this.
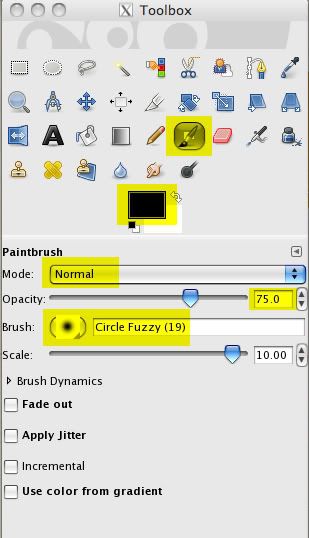
Now I am going to start scraping away some of that top layer. To do this I have used a soft or fuzzy edged brush. The brush colour MUST be black. We do not want to scrub away to hard or we will get obvious separation so I am going to use a large brush at 75% opacity.
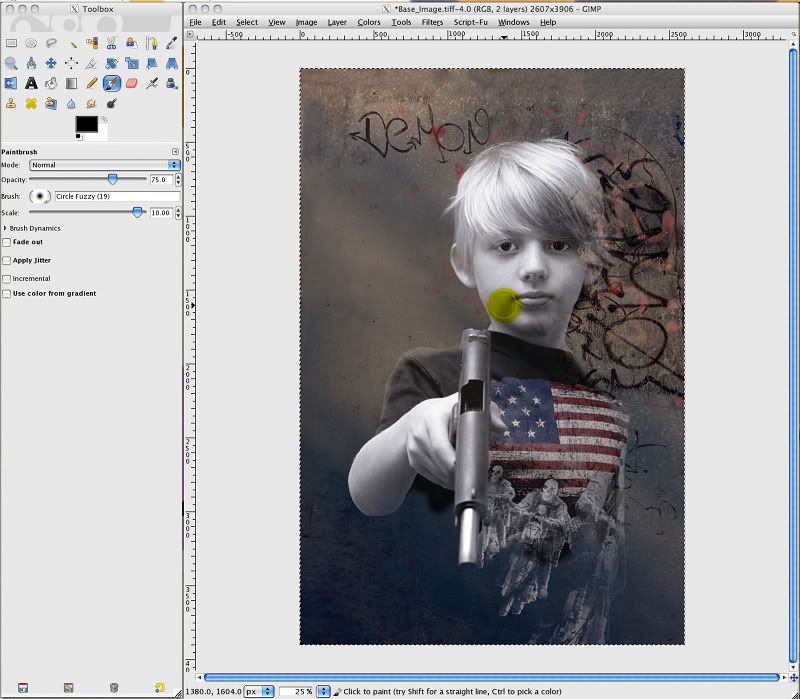
I gently brush over the areas of the image I want to see through the top layer . At this stage I am careful to avoid the outlines of the base image.
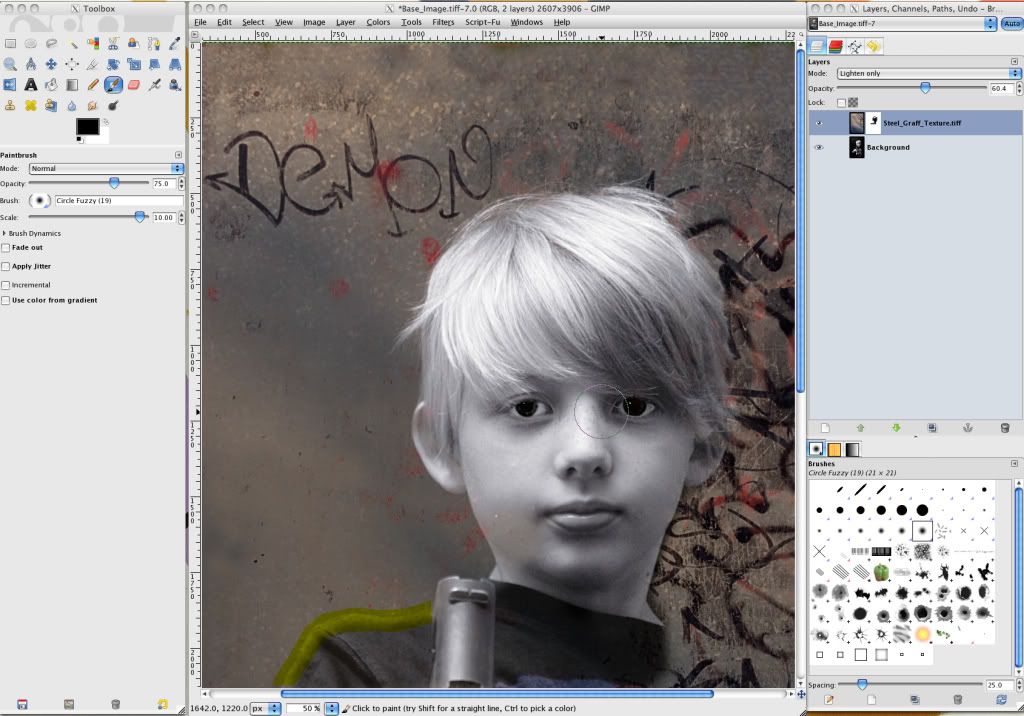
When I have painted within the outline I zoom in and tackle the outline with a smaller brush. I do not need to be too accurate but it is better to stay just within the outline. This gives far better merging. A tablet and pen are ideal for this and I normally use one but in this case - to show it can be done - i have used the mouse.
When I am happy that I have painted through everything I need to I can adjust the opacity again to get the look I want.
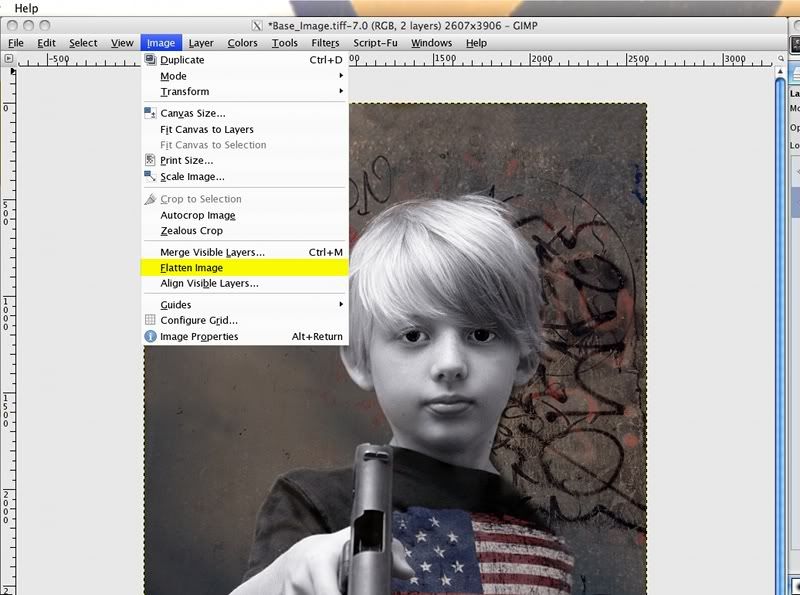
I can now flatten the image. More skilled users of layers will retain the previous layers but that over complicates things for the beginner.
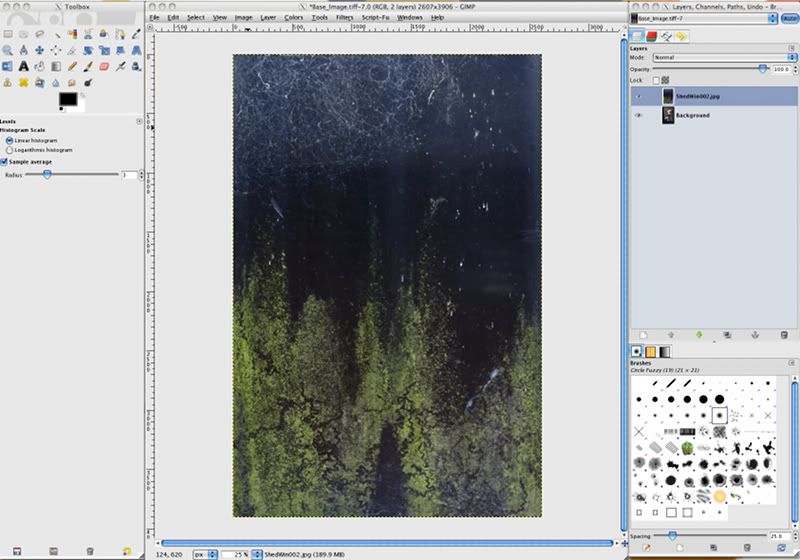
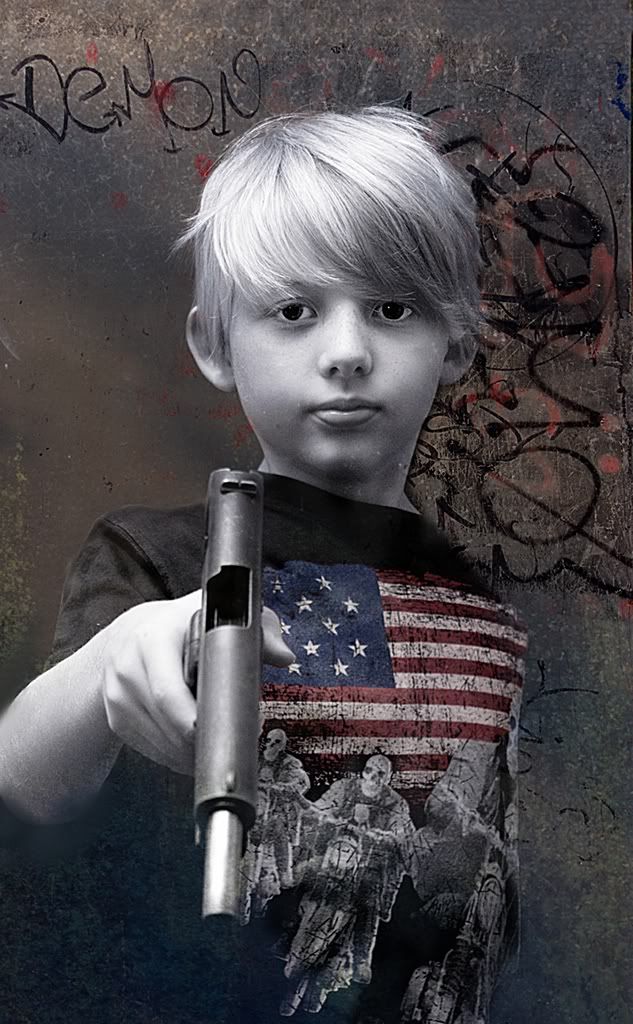
Right I am getting there but it is still not as grungy as I would want so I am going to introduce another texture. This is done exactly as described above for the first texture layer. In this instance I am using an image of an old shed window.
Because I want to get a softer effect I use 'Soft Light' layer mode and adjust the opacity to taste.
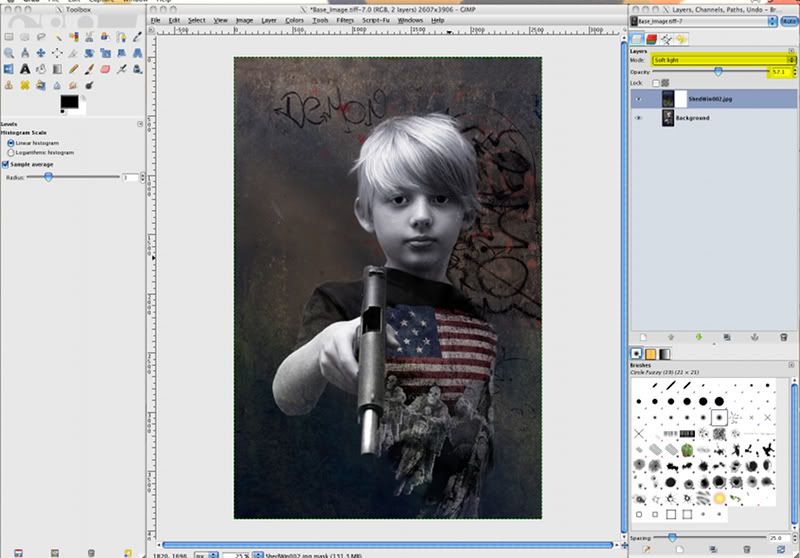
And that is pretty near the layering effect I wanted.
The base image obviously was shot as a black and white image and that remit still stands so I have applied a Paynes B/W conversion filter to get may final image. I have also cropped and sharpened at this final stage.
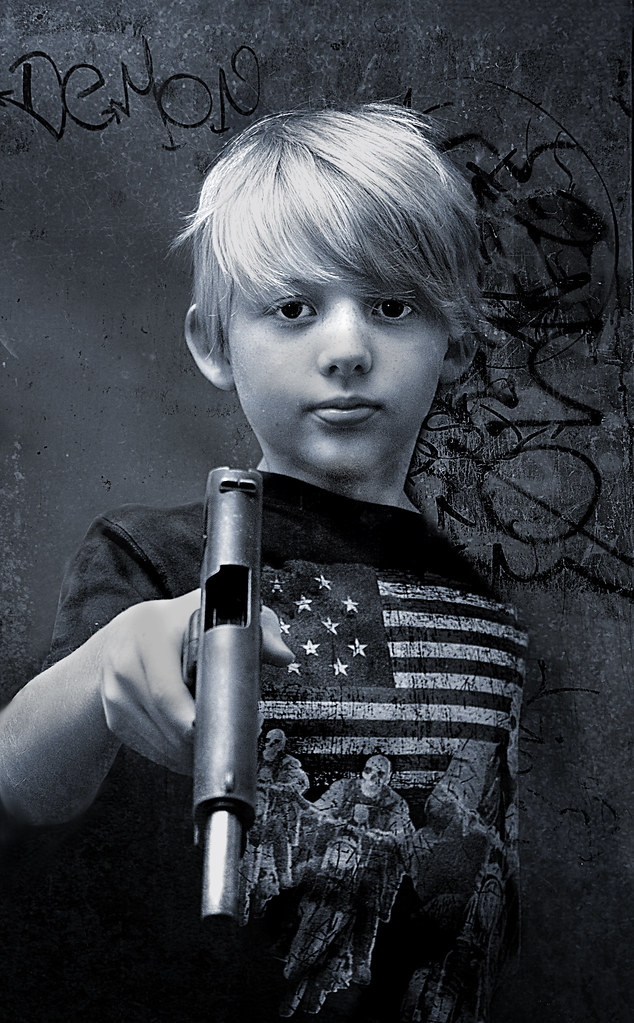
There are still a few things I am not to happy with but it is a relatively simple matter of go redo an image like this. If you are familiar with layers you can save the various layers in a PSD file so that you can easily go back to any stage you wish. Not everyone's cup of tea but it is great fun.
The brief for this tutorial is to take a edgy subject shot with basic lighting and attempt to give the image a grungy feel more in keeping with the subject matter.
I have used GIMP to demonstrate this process but it can easily be adapted to Photoshop as you will see. GIMP is an open source (free) image manipulation application and is well worth a look if you shudder at the cost of Photoshop.
Firstly I open my base image in my image editing software. This image has already been subjected to basic PP.
I am now going to open a separate texture image as a layer - effectively placing the texture on top of the base image. In GIMP this is achieved with the commands File / Open as Layers
For this exercise I have chosen an image of graffiti on stainless steel sheet at the local skate park. You can get texture packs at sites like Deviant Art and the can be used free on a creative commons license but I find it more satisfying to use my own.
You can see the overlaid image appear in the Layers toolbox above the background image
Now I am going to create a layer mask. In this case the layer mask allows me to remove areas of the texture layer (the top layer) exposing portions of the background image below. I think of this as being like two transparencies placed together and scrapping the emulsion off the top transparency to reveal the transparency below;
For this technique the layer mask has to be white at full opacity;
Now this is where the fun starts. The top layer (our texture) can have its mode changed to several different styles. These styles along with the opacity slider determine how the layers will interact to give the finished effect. It is worth a having good play around with different layer modes and the opacity of the top layer...you can get some stunning effects. There is no right or wrong way with this since the way the layers interact will depend on your selected images. Your image will always be unique and the combinations are almost infinite.
I am using the 'Lighten Only' mode. This gives me an even combination of the tones within the two images. At first it will look a little odd but what you can now see is the images combining like two transparencies with one laid atop the other. I adjust the opacity of the top layer so that I can easily see the outlines of each image. I have used about 60% opacity to achieve this.
Now I am going to start scraping away some of that top layer. To do this I have used a soft or fuzzy edged brush. The brush colour MUST be black. We do not want to scrub away to hard or we will get obvious separation so I am going to use a large brush at 75% opacity.
I gently brush over the areas of the image I want to see through the top layer . At this stage I am careful to avoid the outlines of the base image.
When I have painted within the outline I zoom in and tackle the outline with a smaller brush. I do not need to be too accurate but it is better to stay just within the outline. This gives far better merging. A tablet and pen are ideal for this and I normally use one but in this case - to show it can be done - i have used the mouse.
When I am happy that I have painted through everything I need to I can adjust the opacity again to get the look I want.
I can now flatten the image. More skilled users of layers will retain the previous layers but that over complicates things for the beginner.
Right I am getting there but it is still not as grungy as I would want so I am going to introduce another texture. This is done exactly as described above for the first texture layer. In this instance I am using an image of an old shed window.
Because I want to get a softer effect I use 'Soft Light' layer mode and adjust the opacity to taste.
And that is pretty near the layering effect I wanted.
The base image obviously was shot as a black and white image and that remit still stands so I have applied a Paynes B/W conversion filter to get may final image. I have also cropped and sharpened at this final stage.
There are still a few things I am not to happy with but it is a relatively simple matter of go redo an image like this. If you are familiar with layers you can save the various layers in a PSD file so that you can easily go back to any stage you wish. Not everyone's cup of tea but it is great fun.