|
|
Post by cannockwolf on Nov 20, 2012 16:45:00 GMT
sorry justy busy plus i have my own photos im working on atm, need to get these out the way as im going for a weekend away this friday and will have a load more to process lol
What youve done there is great, remember this is only the first of many steps, what weve done is bring the rocks forward a little, were going to keep doing this until were happy we have the right balance, there is no right or wrong, we need to find that balance thats all, ill do the next step tonight when i get on the computer
|
|
|
|
Post by cannockwolf on Nov 20, 2012 16:47:09 GMT
if you open your before and after images into new tabs on your browser you can see what a big effect this small change is having already
|
|
|
|
Post by cannockwolf on Nov 27, 2012 22:11:05 GMT
Sorry about the delay been away at Northumberland this weekend back on it soon
|
|
janis
Working With A Pro
[Mo0:0]
Posts: 898
|
Post by janis on Nov 28, 2012 0:34:49 GMT
No worries. Ready when you are, mon capitaine.
|
|
|
|
Post by cannockwolf on Nov 28, 2012 20:01:39 GMT
Next im using the same technique to add structure to the foreground rocks, darken the darker parts only with a brush that suits the size of the area you want to effect, dont use too big a brush, switch between mine and the last one to see what i did Attachments:
|
|
janis
Working With A Pro
[Mo0:0]
Posts: 898
|
Post by janis on Dec 1, 2012 6:25:10 GMT
Hoping this is what you intended...  |
|
janis
Working With A Pro
[Mo0:0]
Posts: 898
|
Post by janis on Dec 1, 2012 18:24:13 GMT
I'm going to do a redo, but I have to do some shopping first. 'Tis the season and all.
|
|
janis
Working With A Pro
[Mo0:0]
Posts: 898
|
Post by janis on Dec 3, 2012 21:36:41 GMT
My apologies, Dave. Ever the contrarian, I fell up the stairs yesterday, and spent the rest of the day nursing my right hand and leg. The swelling has gone down now and everything appears to be in working order, so I am ready to go on again, but before I do, I just wanted to explain why I was wanting to my last job over and get your reaction.
I know you told me to paint the dark areas only, but given that Aperture's brushes can be set to apply adjustments just to the highlights, midtones or shadows, I thought that I could afford to brush "outside the lines" as it were, with my burn brush set to "Shadows" only. I used your image as a guide and adjusted the "Amount" of my burn to approximate your level of darkness. I am pretty sure the luminance value of my midtones and highlights did not change in real terms, but they look darker in my version and I think that might be due to two things: a) my brush affected a lot of very fine shadow detail that you did not touch because it was so fine and b) through some trick of the eye, the darkening of all that shadow detail makes the midtones and highlights appear darker than they were, although they are not. I am not sure about b) but an example can be seen in the midtone reflection touching the right edge about a fifth of the way up from the bottom. When I position the loupe over it and read the luminance value, it is exactly the same in the before and after images, although it appears darker in the after.
Have I hit upon something here? Have I done exactly what you did not want me to to do? Or can we get what you are after in the long run from this position? My apologies for not following your instructions to the letter, but I feel I have learned something I might not have otherwise.
Looking forward to your response.
|
|
|
|
Post by cannockwolf on Dec 3, 2012 21:41:43 GMT
the first darkening was to effect all the values and bring the roicks forward, so we dont want to just effect the shadows, the second WAS to effect just the dark areas, then we would move on to the lights next
|
|
janis
Working With A Pro
[Mo0:0]
Posts: 898
|
Post by janis on Dec 3, 2012 23:20:27 GMT
Well, apart from everything else, I misread your instructions and thought I was to darken the shadows in the foreground only. Switching windows in my browser was frustrating because the images did not line up, so I downloaded the images to Aperture and switched back and forth between them there. That enabled me to confirm my suspicion that you had darkened shadows everywhere. This time, I have darkened the shadows throughout the entire image, with my burn brush set to Shadows and the amount set to 4. My previous burn amount for Step 1 (darken all tones everywhere but the foreground) was 6. Depending on where we go from here, I see that I might want to burn a little darker here and a little lighter there, but I can do that later, so I will stop here and await further instruction. 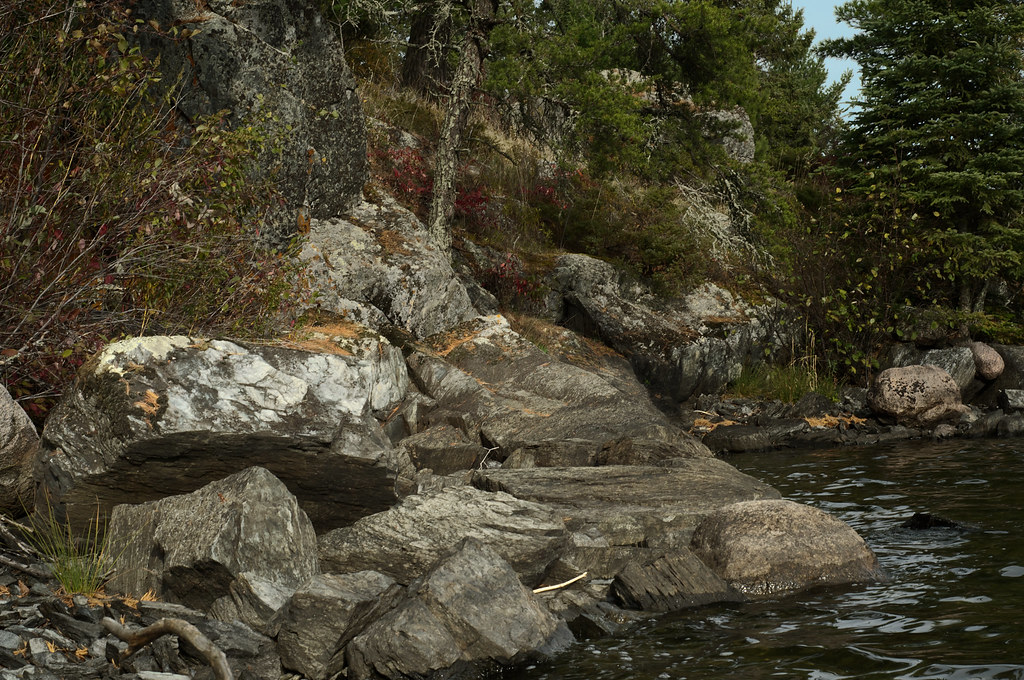 |
|
janis
Working With A Pro
[Mo0:0]
Posts: 898
|
Post by janis on Dec 5, 2012 2:55:39 GMT
I think I took the darks too dark, so again, don't hesitate to tell me to redo.
|
|
|
|
Post by cannockwolf on Dec 5, 2012 8:30:33 GMT
Looks fine on my phone ill take the next step tonight after work
|
|
|
|
Post by cannockwolf on Dec 5, 2012 18:56:54 GMT
Ive lightened the light parts of the rocks and the water and the trees at the top of the water, then darkened a few parts around them to enhance it more.
|
|
|
|
Post by cannockwolf on Dec 5, 2012 18:57:42 GMT
I cant edit posts BTW heres the pic Attachments:
|
|
|
|
Post by cannockwolf on Dec 5, 2012 19:03:30 GMT
then i cropped and put a very small amount of saturation on it, plus i cloned a couple of small distractions on the right hand edge i think thats about it really Attachments:
|
|


